How to Build a React Native Expo App with Supabase and RevenueCat
So you've got an app idea. Maybe it's a productivity tool, a niche community app, or something you personally wish existed. You've heard that React Native and Expo are the way to go if you want to ship on both iOS and Android without building two separate apps. And you're right — they are.
But then comes the next question: how do you actually put all the pieces together? How do you handle users signing up, store their data, and charge them money?
That's exactly what this post covers. A clear, honest walkthrough of how the pieces fit together when you're building a mobile app with Expo, Supabase, and RevenueCat.
First, What Are These Tools and Why These Three?
Let's get the introductions out of the way.
| Tool | What It Does | Why You Need It |
|---|---|---|
| Expo | Framework built on React Native. Write one codebase in JavaScript/TypeScript and produce a native app for both iOS and Android. | Handles building, deploying, push notifications, and updates so you can focus on your app. |
| Supabase | Your backend-as-a-service. Provides a database, authentication, file storage, and real-time features. | No need to set up your own server. You get a dashboard, plug it in, and you're rolling. |
| RevenueCat | Subscription and in-app purchase management. Sits between your app and Apple/Google's payment systems. | Manages who's paid, what plan they're on, trial expiry, and all the receipt validation you never want to deal with. |
Together, these three tools give you everything you need to build, launch, and monetise a mobile app. That's why this stack has become so popular with indie builders and small teams.
The Big Picture: How It All Connects
Before we get into each layer, here's the mental model. Your app has three main concerns:
- The app itself — what users see and interact with (Expo)
- The backend — user accounts, data storage, and business logic (Supabase)
- Payments — subscriptions, paywalls, and purchase management (RevenueCat)
Your Expo app talks to Supabase to authenticate users and read/write data. It talks to RevenueCat to manage purchases and check subscription status. And RevenueCat can talk to Supabase through webhooks to keep everything in sync.
That's it. Three tools, three concerns, all connected.
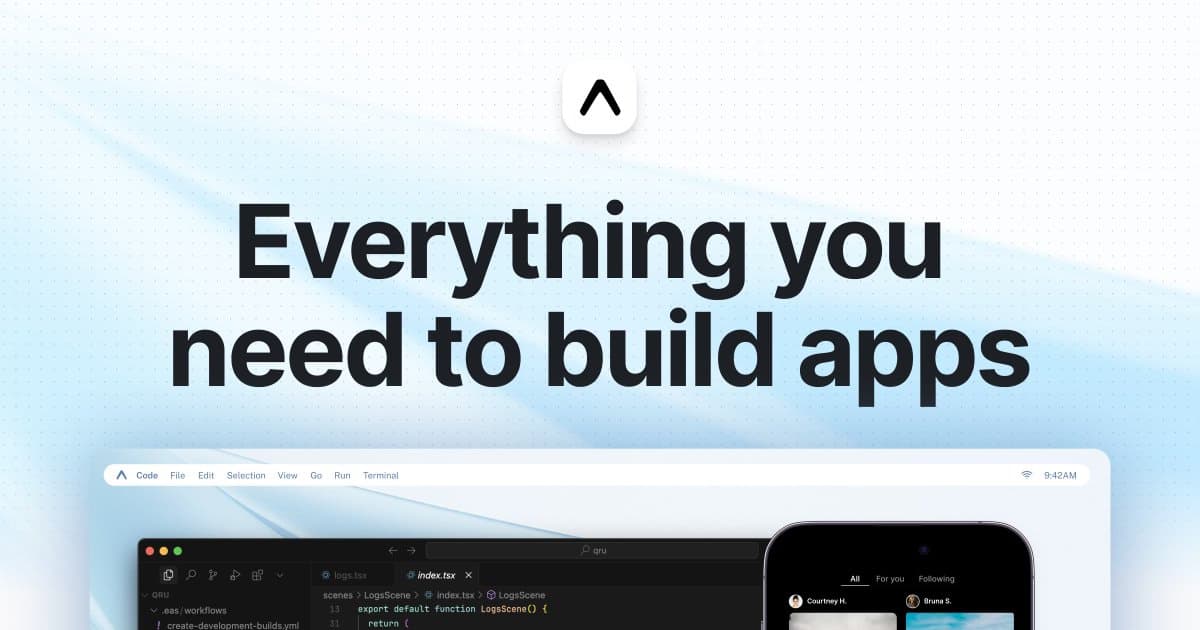
Step 1: Set Up Your Expo Project
Everything starts with creating your Expo project. This is your workspace — the folder on your computer where all your app code lives.
When you create a new Expo project, you get a basic app structure out of the box. From there, you'll set up:
- Screens — the different pages of your app (home, settings, profile, etc.)
- Navigation — how users move between those screens
- Styling — the overall look and feel
Expo uses a file-based routing system these days, which means the way you organise your files determines your app's navigation structure. It's intuitive once you see it — create a file called profile.tsx and you've got a profile screen.
The key decision at this stage is planning your screens. What does your app actually need? A home screen, a settings screen, a paywall screen? Sketch it out, even roughly. It'll save you time later.
Step 2: Add Authentication with Supabase
Almost every app needs user accounts. People need to sign up, log in, and have their data tied to their identity.
Supabase gives you this out of the box. You create a Supabase project (it's free to start), and you get a full authentication system with multiple sign-in methods:
- Email and password
- Magic links (passwordless email login)
- Google Sign-In
- Apple Sign-In
In your Expo app, you'll install the Supabase library, connect it to your project using your unique project URL and API key, and then use Supabase's built-in functions to handle sign-up and login flows.
The important concept here is auth state. Once a user logs in, your app knows who they are. You'll typically wrap your app in an "auth provider" — a layer that checks whether the user is logged in and either shows them the app or redirects them to the login screen. This is a pattern you'll see in virtually every app built this way.
Worth knowing: Apple requires Apple Sign-In if you offer any other third-party sign-in method. And Google is just what people expect. Both require some additional configuration in Supabase and the respective developer consoles — it's not hard, but don't skip it.
Step 3: Set Up Your Database
Once users can sign in, you need somewhere to store their stuff. Supabase gives you a PostgreSQL database — the same kind of database used by companies of all sizes.
You don't need to be a database expert. The basics are simple:
- You create tables (think spreadsheets) to store different types of data
- Each table has columns (fields like name, email, created date)
- Each table has rows (individual records)
Supabase has a visual table editor right in the dashboard, so you can create and manage your tables without writing any database queries if you don't want to.
Row Level Security (RLS) — Don't Skip This
This is Supabase's way of making sure users can only access their own data.
| Without RLS | With RLS |
|---|---|
| Anyone could technically read anyone else's data | Users can only access rows that belong to them |
| Major security risk | Simple rules like "only read rows where user_id matches your own" |
| Never do this in production | Non-negotiable for any real app |
Supabase makes setting up RLS pretty straightforward, and you should always turn it on.
Step 4: Integrate RevenueCat for Payments
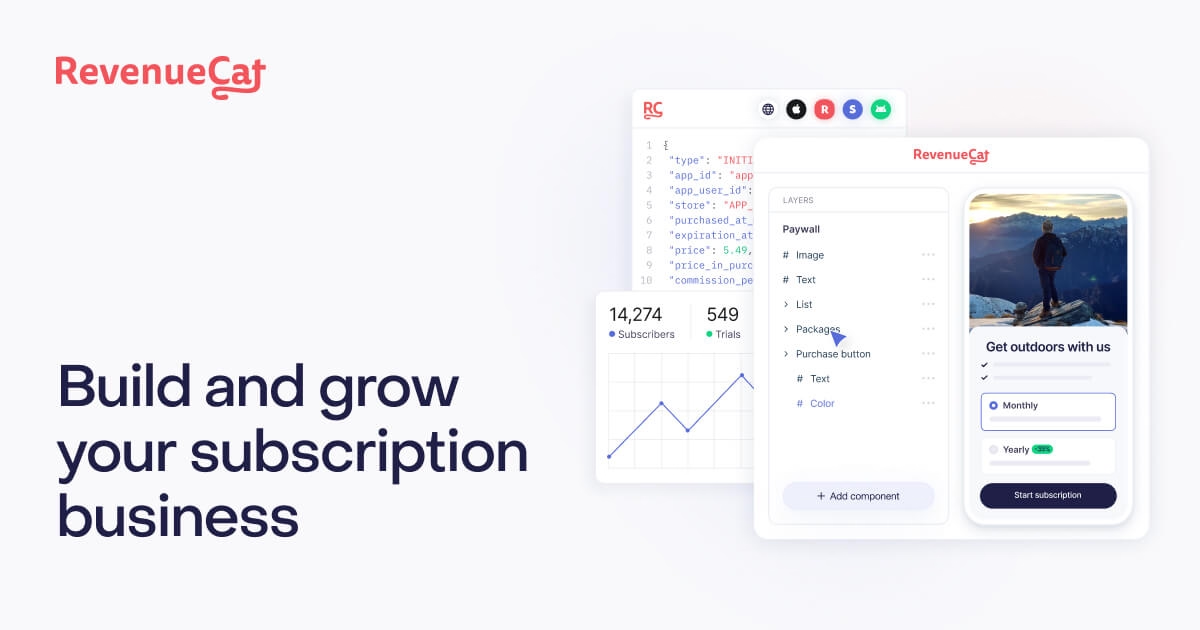
This is the part most people dread, and RevenueCat is the reason you don't need to.
Here's the reality: Apple and Google both have their own payment systems, their own rules, their own receipt formats, and their own ways of handling trials, renewals, cancellations, and refunds. Managing all of this yourself is genuinely painful. RevenueCat abstracts it all away.
Here's how it works at a high level:
- Create your products — Set up subscription plans (monthly, yearly, etc.) in App Store Connect (Apple) and Google Play Console (Google).
- Connect to RevenueCat — Create a RevenueCat project and link it to your Apple and Google accounts. RevenueCat now knows about your products.
- Install the SDK — Add the RevenueCat library to your Expo app and initialise it. RevenueCat handles the purchase flow — showing the payment sheet, processing the transaction, validating the receipt.
- Check subscription status — After a purchase, your app can ask RevenueCat at any time: "Does this user have an active subscription?" and get a simple yes or no.
The big win is that RevenueCat gives you a single, unified way to check subscription status regardless of whether the user bought through Apple or Google. You write your paywall logic once.
Step 5: Connect Everything Together
This is where it gets satisfying. You've got your three tools running. Now you connect them.
Linking Users Across Systems
When a user signs up via Supabase, they get a unique user ID. You'll use this same ID to identify them in RevenueCat. Both systems then know they're talking about the same person.
Protecting Premium Content
In your app, you'll check the user's subscription status via RevenueCat before showing premium features:
- No active subscription? → Show the paywall
- Active subscription? → Let them through
It's a simple check, but it's the core of your monetisation logic.
Keeping Things in Sync with Webhooks
RevenueCat can send webhooks (automated notifications) to Supabase whenever something happens:
- A new purchase
- A subscription renewal
- A cancellation
- A billing issue
This means your database always has an up-to-date record of each user's subscription status without your app constantly checking. This is optional but really useful — especially if you want to send emails to churned users or track revenue in your own dashboard.
Step 6: Build Your Paywall
Your paywall is the screen that convinces users to pay. It shows your subscription options and handles the purchase flow.
With RevenueCat, building a paywall is relatively simple. You fetch the available packages (your subscription plans with their prices), display them in a nice UI, and when the user taps "Subscribe," you call RevenueCat's purchase function. It handles the rest — the native payment sheet pops up, the user confirms with Face ID or their password, and RevenueCat processes everything.
Tips for a good paywall:
- Keep it clean and focused — don't overwhelm users with options
- Show the value clearly — what do they actually get?
- If you offer a free trial, make that obvious and prominent
- Test on both iOS and Android — the purchase experience feels slightly different on each platform
- Consider showing social proof or key features above the subscription options
Step 7: Test, Build, and Ship
Once everything is wired up, you'll want to test the full flow:
- Sign up / log in
- Use the app as a free user
- Hit the paywall
- Make a test purchase (using sandbox credentials)
- Confirm premium content unlocks
- Test cancellation and expiry behaviour
Both Apple and Google provide sandbox environments for testing purchases without spending real money. RevenueCat integrates with these sandbox environments, so you can test the entire payment flow end to end.
When you're ready to ship, Expo makes the build process remarkably smooth. You use EAS Build (Expo's cloud build service) to create your iOS and Android binaries, then submit them to the App Store and Google Play.
Reality check: Apple's review process can take a day or two (sometimes longer), and they can be particular about certain things. Google is generally faster. Budget a bit of patience for this step.
The Full Stack at a Glance
| Layer | Tool | Key Responsibilities |
|---|---|---|
| Frontend | Expo (React Native) | UI, navigation, user experience, native features |
| Auth | Supabase Auth | Sign up, log in, session management, social auth |
| Database | Supabase (PostgreSQL) | Data storage, row-level security, real-time sync |
| Payments | RevenueCat | Subscriptions, paywalls, receipt validation, entitlements |
| Build & Deploy | EAS (Expo Application Services) | Cloud builds, app store submissions, OTA updates |
The Honest Truth About This Stack
This stack is genuinely great, and it's what I'd recommend to anyone building a mobile app today. But let me be real about a few things.
- You will write code. But the amount of boilerplate and infrastructure work these tools eliminate is enormous. What used to take a team of developers and months of work can now be done by a single person in weeks.
- You'll hit friction points. Deep linking, push notifications, specific native features — there are areas where things get fiddly. Expo has improved massively, but mobile development still has its moments.
- The free tiers are generous. Supabase, RevenueCat, and Expo all have free tiers that will carry you through development and early launch. You won't need to spend money until you're actually making money.
- This stack scales. These aren't toy tools. Supabase runs on PostgreSQL. RevenueCat manages billions of dollars in subscription revenue. Expo apps are running in production at serious scale. You're not going to outgrow these tools anytime soon.
Frequently Asked Questions
Do I need to know React to use Expo?
Yes, but you don't need to be an expert. A basic understanding of React concepts — components, state, and props — is enough to get started. Expo handles most of the complexity that comes from React Native specifically, so you're mostly writing standard React with some mobile-specific patterns.
How much does this stack cost to get started?
Nothing upfront. Supabase has a generous free tier (two free projects, 50,000 monthly active users for auth, 500MB database). RevenueCat is free until you hit $2,500 in monthly tracked revenue. And Expo's free tier includes enough build credits to get you launched. You can build and ship a real app without spending a penny on infrastructure.
Can I use this stack for a one-time purchase app instead of subscriptions?
Absolutely. RevenueCat supports one-time purchases and lifetime access in addition to subscriptions. The setup process is nearly identical — you just configure a different product type in App Store Connect and Google Play Console.
How long does it take to build an app with this stack?
It depends on complexity, but a focused MVP with authentication, a core feature, and a paywall can realistically be built in two to four weeks by a single developer. The stack removes a lot of the typical setup time, so most of your effort goes into the actual product.
Do I need a Mac to build iOS apps?
For development and testing in the iOS Simulator, yes — you'll need a Mac. However, Expo's EAS Build service runs in the cloud, meaning you can technically build your iOS binary from any machine. You will still need an Apple Developer account ($99/year) to submit to the App Store.
What about push notifications?
Expo has built-in support for push notifications through Expo Notifications. You'll need to configure it with Apple's APNs (Apple Push Notification service) and Google's FCM (Firebase Cloud Messaging), but Expo provides a unified API that works across both platforms. It's one of those areas where Expo genuinely saves you a lot of time.
Can I add a web version of my app too?
Yes. Expo supports web as a target platform, though the experience isn't always one-to-one with mobile. Simple apps translate well to web. More complex apps with heavy native features may need some platform-specific adjustments. It's worth considering from the start if web is important to you.
How do I handle app updates after launch?
Expo offers Over-the-Air (OTA) updates through EAS Update. This lets you push JavaScript-level changes to your app instantly without going through the app store review process. For changes that involve native code (new libraries, configuration changes), you'll need a full rebuild and resubmission.
Is Supabase better than Firebase for this stack?
They solve similar problems, but Supabase is built on PostgreSQL (a full relational database) while Firebase uses a NoSQL document model. Supabase tends to be more intuitive if you're used to thinking in tables and relationships, and its row-level security model is powerful. It also pairs more naturally with Expo. Firebase is a solid choice too, but for this particular stack, Supabase is the better fit.
What happens if RevenueCat goes down — can users still use the app?
RevenueCat caches subscription status on the device, so even if their servers are briefly unavailable, your app can still check whether a user has an active subscription. This is one of the underrated benefits of using RevenueCat — it's built to be resilient.